Why I chose Cloud-Init for KVM Automation
Typically, I’ve built VMs either through Proxmox using its automation scripts, Vagrant for small disposable environments, or by spinning up an installation ISO and stepping through the Ubuntu installer manually. That’s been fine for general-purpose workloads, but now I’m building a small Kubernetes cluster on my RIG for testing — and I want something far more structured, repeatable, and aligned to the way I’m evolving my homelab.
Cloud-init
I’ve known about cloud-init for quite some time, and in the networking world I’ve worked extensively with Juniper QFX switches, DHCP bootstrapping, and zero-touch provisioning workflows. Those concepts have always appealed to me — the idea of completely automating device bring-up — so this felt like the right moment to take those principles and explore them more deeply inside my own infrastructure.
Aligning This Work With My Homelab Roadmap
I’m also in the middle of tightening up how I handle passwords, secrets, and passphrases across the environment, as well as improving how I track infrastructure in NetBox and automate day-to-day operational tasks. All of this ties directly back to the long-term homelab roadmap I laid out in my previous post:
Key Stages
- Observability – Monitor and visualise all systems
- Alerting – Notify and escalate intelligently
- High Availability – Build redundancy and resilience
- Ops Management – Centralise and automate operational tasks
- NetBox – Define and track the source of truth
- Automation – Achieve reproducible, versioned infrastructure
- Backup – Protect data and ensure recovery
- NGINX – Manage ingress, SSL, and load balancing
- AI – Extend capabilities with intelligent local systems
- Security – Harden the stack and integrate identity management
How Cloud-Init Fits Into That Strategy
This cloud-init approach directly supports several of those stages.
It strengthens Automation by making VM builds fully reproducible; improves Ops Management by removing manual provisioning and configuration drift; reinforces NetBox by aligning nodes with tracked IPs and metadata; and contributes to Security by moving toward consistent, hashed, and centrally tracked credentials.
By storing these configurations inside GitLab, I’m also setting myself up to integrate CI/CD (via Jenkins or GitLab CI) so new VMs, cloud-init templates, and images can be validated and versioned just like any other piece of infrastructure code.
What This Post Covers
This post walks through the method I’ve settled on: building a reusable Ubuntu Server VM image using cloud-init — complete with static networking, user configuration, and the tools I need for Kubernetes experimentation — then storing everything in Git so I can easily replicate, track, and automate new nodes as the lab continues to expand.
Why Not Just Use the Cloud?
There’s always someone who asks why I don’t just spin all of this up in the cloud — or why I’m bothering with KVM, NetBox, GitLab, or local automation at all. The reality is that this isn’t about competing with AWS or GCP. My goal here is to understand the full lifecycle of infrastructure: provisioning, networking, automation, identity, observability, and everything in between. Running these systems locally gives me transparency, repeatability, and control without worrying about cloud billing, limits, or abstracted-away layers. This is a learning platform, not a production environment, and building it myself teaches me more than any managed service ever could.
System Requirements
For this setup I’m using:
- Ubuntu host (with plenty of RAM/CPU — in my case, 128GB RAM and an i9-14900K)
- KVM/QEMU/libvirt installed
- A Linux bridge (
br0) already configured so VMs land on the LAN - Cloud-init ISO files for declarative VM provisioning
Everything here is local — this is a learning environment, not production — but I still want it to behave like production-grade infrastructure.
Create a Linux Bridge (br0)
To integrate the VMs directly into my home lab network, I’m using a Linux bridge attached to my physical NIC. This lets each VM set a real LAN IP address rather than hiding behind NAT.
/etc/netplan/01-netcfg.yml
network:
  version: 2
  ethernets:
    enp3s0: {}
  bridges:
    br0:
      interfaces: [enp3s0]
      dhcp4: true
      parameters:
        stp: false
        forward-delay: 0
      nameservers:
        addresses: [192.168.99.1, 1.1.1.1]
Apply it:
sudo netplan applyFrom here on, every VM connects to br0, gets a predictable static IP,
and behaves just like any other device on the network.
Step 1 — Prepare Directory Structure
mkdir -p /mnt/data/vms/{images,cloud-init/lab-k8s-cp1}
cd /mnt/data/vms/cloud-init/lab-k8s-cp1
This becomes the home for all VM definitions — control-plane, worker nodes, and any future lab systems.
Step 2 — Create Cloud-Init Files
Cloud-init lets me define everything declaratively:
- users
- SSH keys
- packages
- Docker/container runtimes
- networking
- hostname
- startup commands
This ensures each Kubernetes node is consistent and reproducible.
Generate Password Hash
openssl passwd -6 "The passphrase"Cloud-init accepts hashed passwords, which is ideal for storing this in Git later.
user-data
#cloud-config
hostname: lab-k8s-cp1
timezone: Europe/London
users:
  - name: simon
    shell: /bin/bash
    groups: [sudo, docker]
    lock_passwd: false
    passwd: " 🔐 the openssl hash 🔐 "
    sudo: ALL=(ALL) NOPASSWD:ALL
    ssh_authorized_keys:
      - ssh-rsa HOST KEY
package_update: true
package_upgrade: true
packages:
  - docker.io
  - curl
  - net-tools
  - vim
  - htop
runcmd:
  - systemctl enable docker
  - usermod -aG docker simon
meta-data
instance-id: lab-k8s-cp1
local-hostname: lab-k8s-cp1
network-config (Static IP)
version: 2
ethernets:
  enp1s0:
    dhcp4: no
    search: [local.simon-brooks.co.uk]
    addresses:
      - 192.168.99.10/24
    gateway4: 192.168.99.1
    nameservers:
      addresses:
        - 192.168.99.1
        - 1.1.1.1
Step 3 — Generate Cloud-Init ISO
cd /mnt/data/vms/cloud-init/lab-k8s-cp1
genisoimage -output seed.iso -volid cidata -joliet -rock user-data meta-data network-config
Each VM/node gets its own seed ISO.
Step 4 — Download Ubuntu Cloud Image
wget https://cloud-images.ubuntu.com/noble/current/noble-server-cloudimg-amd64.img
mv noble-server-cloudimg-amd64.img /mnt/data/vms/images/lab-k8s-cp1.qcow2
Cloud images are lightweight and optimised for automated provisioning.
Step 5 — Launch the VM with virt-install
virt-install --name lab-k8s-cp1 --memory 4096 --vcpus 2 --disk path=/mnt/data/vms/images/lab-k8s-cp1.qcow2,format=qcow2 --disk path=/mnt/data/vms/cloud-init/lab-k8s-cp1/seed.iso,device=cdrom --os-variant ubuntu24.04 --graphics none --console pty,target_type=serial --import --network bridge=br0Cloud-init handles everything — package installation, user creation, networking, and configuration — fully automated.
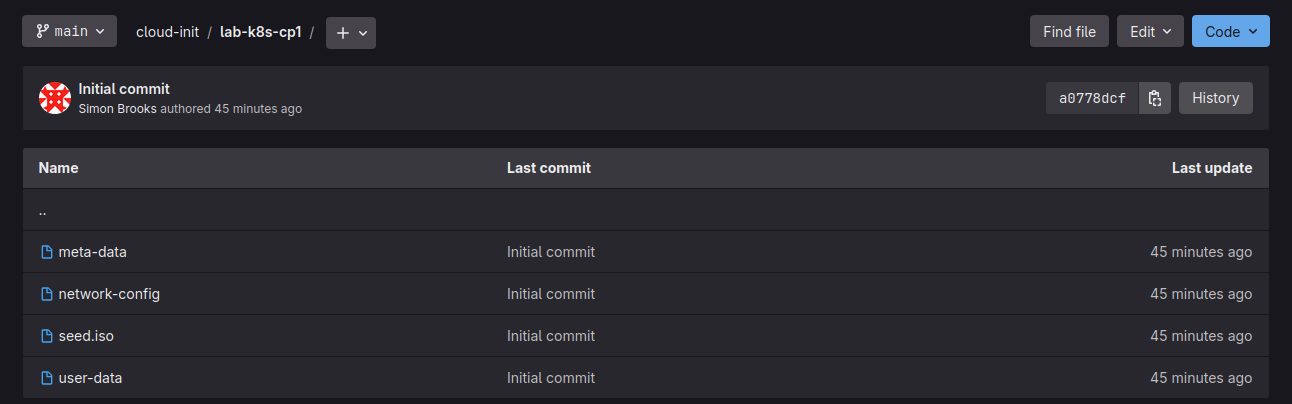
Step 6 — Version-Control Cloud-Init in GitLab
Once the first node is working, I store the cloud-init configuration inside my local GitLab. This gives me an audit trail, makes changes trackable, and keeps provisioning reproducible across all nodes.
I simply create a project in GitLab for my cloud-init definitions and copy the files from my VM build directory into it.
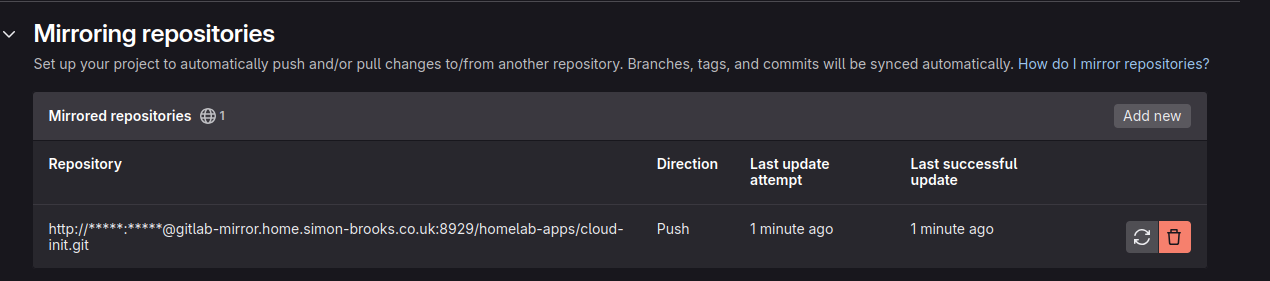
Step 7 — replicating the Repo into GitLab-Mirror
I then mirror the repository into my GitLab-mirror instance so it is backed up and accessible across systems. I’m not automating the sync yet; I’m manually updating it as needed.
Summary
By combining cloud-init, KVM, static networking, and GitLab for version-control, I now have a reproducible, declarative VM build process — perfect for spinning up Kubernetes nodes as I learn and experiment. This gives me a clean foundation for building the cluster, tracking configuration drift, and extending my lab with additional tooling over time.
Appendix — Add to NetBox
Because I’m building multiple nodes, I’m tracking them in NetBox by:
- creating the prefix (for example,
192.168.99.0/24) - reserving static IP addresses for Kubernetes nodes
- creating device entries ahead of time
Appendix — Build and Rebuild Process
When I build or update any of the cloud-init files to rebuild, this is the process I’m using.
Delete existing VM and disk:
virsh destroy lab-k8s-cp1 2>/dev/null
virsh undefine lab-k8s-cp1 --remove-all-storage 2>/dev/null
rm -f /mnt/data/vms/images/lab-k8s-cp1.qcow2
Clone from base cloud image and adjust disk size to 40G:
cp /mnt/data/vms/images/ubuntu-24.04-cloud.img /mnt/data/vms/images/lab-k8s-cp1.qcow2
qemu-img resize /mnt/data/vms/images/lab-k8s-cp1.qcow2 40G
Recreate cloud-init ISO:
genisoimage -output /mnt/data/vms/cloud-init/lab-k8s-cp1/seed.iso
  -volid cidata -joliet -rock user-data meta-data network-config
Remove the old SSH Key:
ssh-keygen -f '/home/simon/.ssh/known_hosts' -R '192.168.99.10'Launch the VM:
virt-install
  --name lab-k8s-cp1
  --memory 4096
  --vcpus 2
  --disk path=/mnt/data/vms/images/lab-k8s-cp1.qcow2,format=qcow2
  --disk path=/mnt/data/vms/cloud-init/lab-k8s-cp1/seed.iso,device=cdrom
  --os-variant ubuntu24.04
  --graphics none
  --console pty,target_type=serial
  --import
  --network bridge=br0
Appendix — Powering off VMs
A quick process to power off all VMs.
1. List all running VMs
virsh list
 Id   Name          State
-----------------------------
 1    ubuntu24.04   running
 11   lab-k8s-cp2   running
 12   lab-k8s-cp3   running
 13   lab-k8s-w1    running
 14   lab-k8s-w2    running
 15   lab-k8s-cp1   running
2. Shutdown all running VMs (graceful)
for vm in $(virsh list --name); do
  virsh shutdown "$vm"
done

Domain 'ubuntu24.04' is being shutdown

Domain 'lab-k8s-cp2' is being shutdown

Domain 'lab-k8s-cp3' is being shutdown

Domain 'lab-k8s-w1' is being shutdown

Domain 'lab-k8s-w2' is being shutdown

Domain 'lab-k8s-cp1' is being shutdown
3. Confirm All VMs Are Off
virsh list