This weekend I’ve been working on a couple of upgrades for my homelab network.
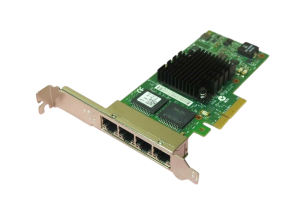
I recently picked up a Juniper SRX320 to use as the edge router/switch for my lab, along with a 4-port Intel I350-T4 NIC for my workstation.
Once everything was powered up, the first thing I noticed was the noise.
The SRX320 sounded like a jet engine.
That’s when I remembered that the smaller SRX300 models were fanless and much quieter. Unfortunately the SRX320 uses small high-RPM fans designed for comms room and such environments — not a quiet home office.
Back during the pandemic I remembered seeing a Reddit post where someone replaced the stock fans with Noctua fans, a brand I’ve used many times for PC builds.
So naturally… another lab project was born.
Disclaimer
This modification is intended for home lab use only.
Specs
Parts used
- 2 × Noctua NF-A4x20 PWM (12V)
Tools
- 1 × Phillips screwdriver
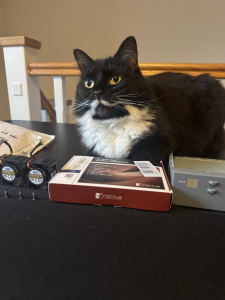
- 1 × Quality Assurance Cat (optional but recommended)
Step 1 — Remove the Case
There are:
- 4 screws on the top of the chassis
- 3 screws on the bottom
Remove these and the lid slides off easily.
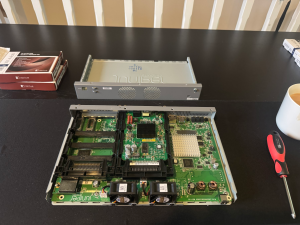
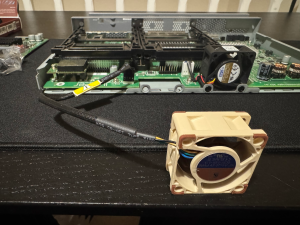
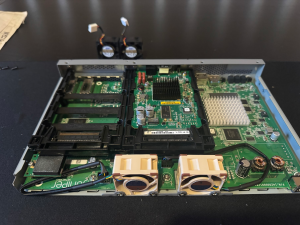
Once the chassis is open you’ll see the two small stock fans mounted at the front of the device.
Remove the black mounting screws and disconnect the fan from the power header.
Step 2 — Install the Replacement Fans
The new fans connect directly to the same power connector.
Once connected, simply screw them into the existing mounting points.
At this point I made a small mistake.
I originally bought the 5V version of the Noctua fans from The Pi Hut without realising the SRX320 expects 12V fans.
Not a complete waste though — the 5V fans will be perfect for future ESP32 or Raspberry Pi cooling projects.
Step 3 — Install the Correct Fans
After ordering the correct 12V Noctua fans, the installation was straightforward.
The fans fit neatly into the chassis and mount using the same screw positions.
Quality control was present to supervise the operation.
Step 4 — Final Result
Once the fans were installed and the cables tidied up, the chassis could be closed back up.
Before putting the lid back on, here’s the final internal layout.
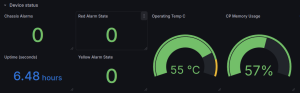
Step 5 — Verification
After powering the device back on, Junos confirms both fans are operating normally.


Result
The difference is dramatic.
Instead of the high-pitched whine of the stock fans, the SRX320 is now virtually silent while still maintaining proper airflow.
A simple upgrade, but one that makes enterprise gear far more usable in a home lab.
And most importantly, the Quality Assurance department approved the result.